Introduction
Postman
is a
powerful HTTP client for testing web services. Created by Abhinav Asthana, a
programmer and designer based in Bangalore, India, Postman makes it easy to
test, develop and document APIs by allowing users to quickly put together both
simple and complex HTTP requests. Postman is available as both a Google Chrome
Packaged App and a Google Chrome in-browser app. The packaged app version
includes advanced features such as OAuth 2.0 support and bulk
uploading/importing that are not available in the in-browser version. The
in-browser version includes a few features, such as session cookies support,
that are not yet available in the packaged app version. At publication time,
the Postman REST Client is one of the highest-rated productivity apps in the
Chrome Web Store, with more than 348,000 unique users (for both versions), and
more than 63,000 collections shared via Postman (more on that later). This post
is an in-depth review of the Postman Google Chrome
Packaged App
highlighting the key
features that make Postman a must-have tool for API developers and consumers at
all levels of experience.
How to work with AdviceOS API using Postman
To use AdviceOS API, you must have a “Secret” generated within AdviceOS. Contact Midwinter to provide data sharing agreement and permission to access the API key generation page in AdviceOS. This access is hidden by default. There are cases where you have a “Secret” but you cannot access AdviceOS API. This could be due to the following reasons:
· You have exceeded your Maximum Active Token limit.
· You have the secret but your client is inactive.
· Your IP is restricted i.e. you do not have access rights to call AdviceOS API services.
For getting Secret or having any of the above issues (in case you already have the Secret), please contact Midwinter Support.
For testing the secret you have to do the following steps (Postman will also be explained in these steps):
Get an Access Token
1. Open Postman, click on “+” button to create a new request.
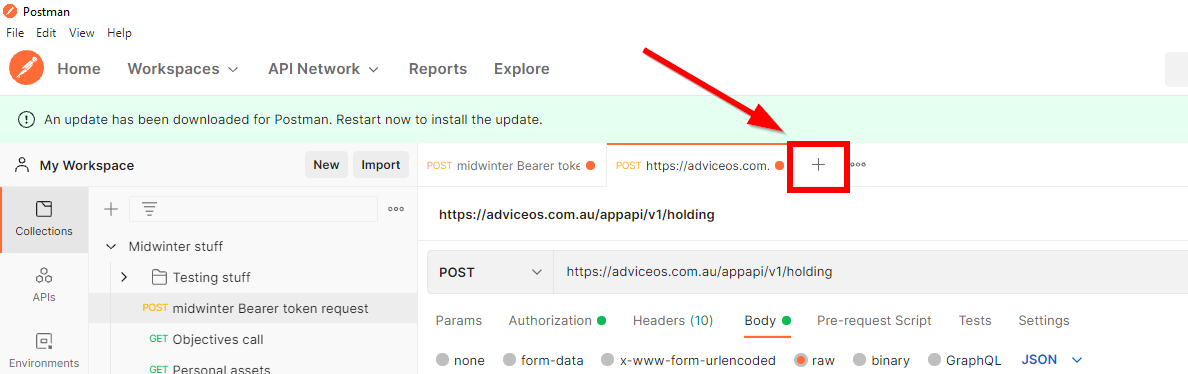
2. Select the method as “Post”, paste the url (mentioned below) in the available textbox.
https://test.adviceos.com.au/appapi/v1/security/token
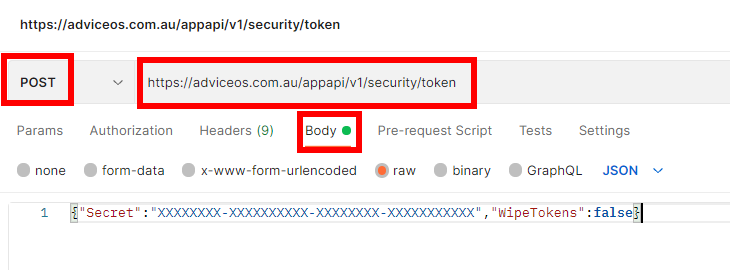
3. Click on Body and paste the secret in this format
{'Secret':'FAACFF63-4141-41A1-ABE5-79B59ECEE6CA','WipeTokens':false}
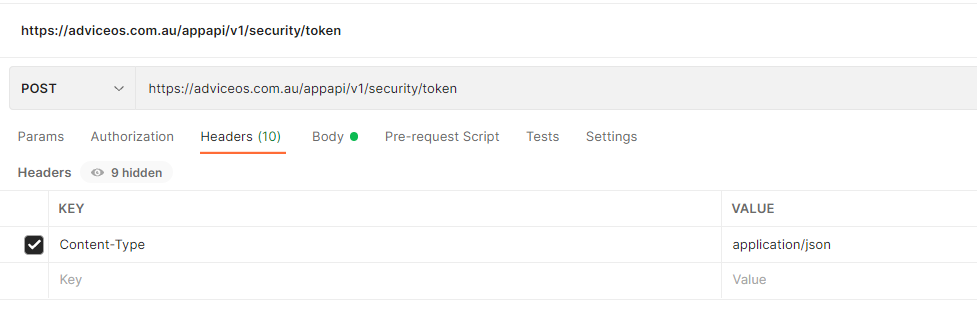
4. Click on the Headers tab, set Content-Type as ‘application/json’.
5. Once you are sure that all the previous steps are done, click on ‘Send’.
6. If all goes well, you will receive a token (given below) along with its expiry details. You will need this token for subsequent requests to the Postman.

API
Considerations before you start
|
· Please note that you can only work with the API if you have an access token (as explained in Postman tutorial). |
|
· The url address(es) provided here are only for demo purposes. For clients and companies, Midwinter will provide you the exact Url to work with. · The access token used in these examples might be different to the one you receive from Midwinter, so it is advised to use your own access token for testing/running purposes. |
|
· In most scenarios, only the first part of the url needs to be replaced (as shown), remaining part of the url would remain the same. |
|
|
|
· As shown in the diagram, the part of the url that has been crossed (with red) would be replaced by the url provided by Midwinter e.g. it can be like http:// or https://AdviceOS.com/appapidocsui/index. |

Now that you have got enough idea to work with the API, let’s start with the API
Understanding the API structure
Let’s select “PersonalAsset” module as an example and prepare it to see the results through Postman.
1. As shown in the figure below, we have selected PersonalAsset and selected one from the list of its possible operations.
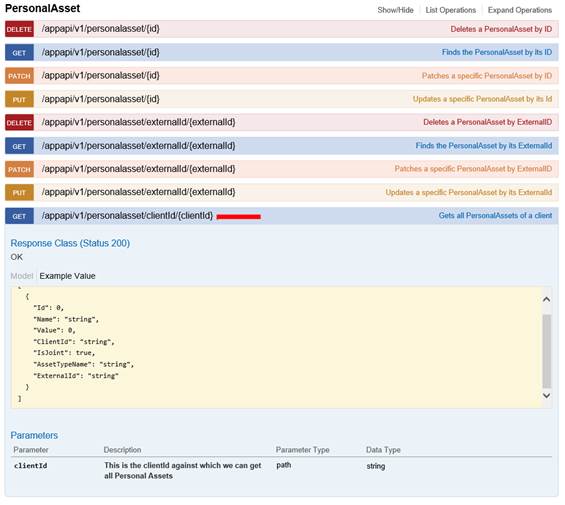
2. After clicking “Get”, will get something like this explained below.
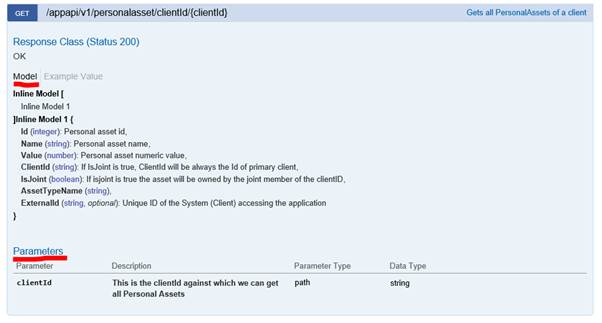
As shown in the screenshot (below), we have a few things to explain here.
a. Model: It contains detailed description of the model (with datatypes) to be returned in case of a successful request.
b. Parameter(s) to be passed with the request.
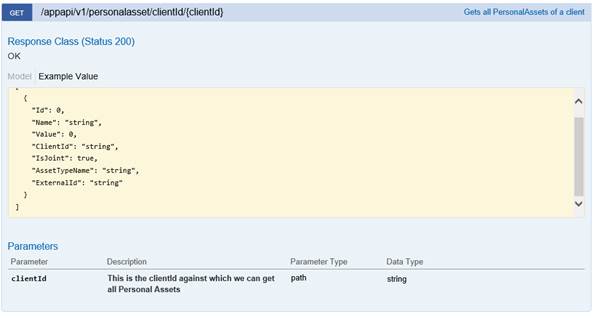
c. The json to be returned in case of a successful request (click the Example Value tab) as shown in the picture below.
Build a request using Postman
Now that you have got sufficient idea of the API structure,
let’s do it with Postman.
P.S. We’ll try to explain as much detail as we can in the first request. Once
you get an idea of this, we’ll explain the others quickly.
API: Get PersonalAsset by ClientId
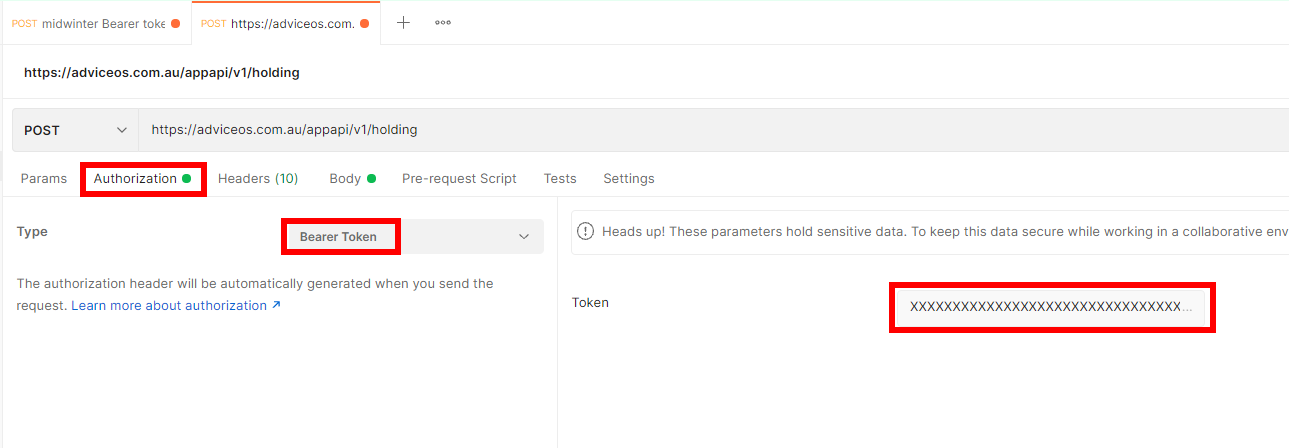
1. Click on the “+” button of Postman, select the Get method and paste the midwinter URL and the endpoint for the desired call

2. Click on Authorisation tab, select "Bearer Token" from the "type" drop down, then enter the "token" which is generated using the /appapi/v1/security/token call and the provided API key”.
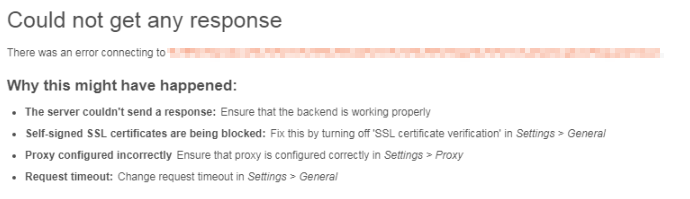
3. After sending the request, you will see a results like this:
a. In case API is not working (on Midwinter side)
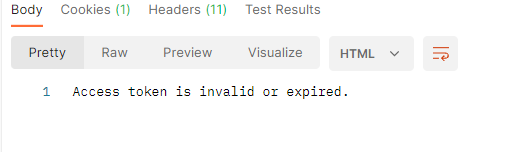
b. Invalid or expired access token
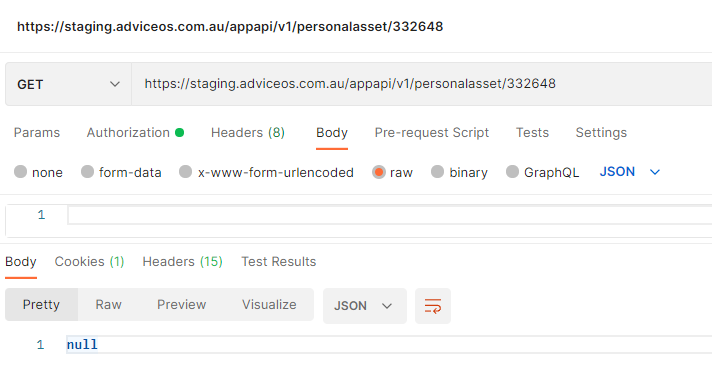
c. Invalid client Id (nothing returned)
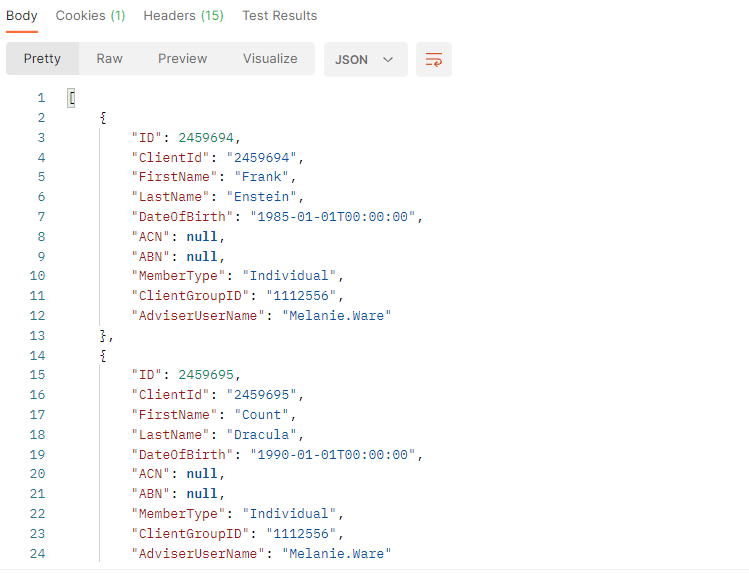
d. Successful response with valid client Id
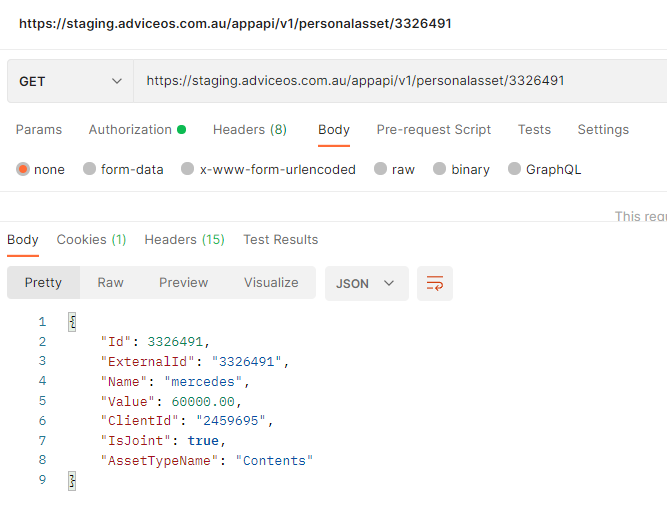
API: Get PersonalAsset by its ID (Get)
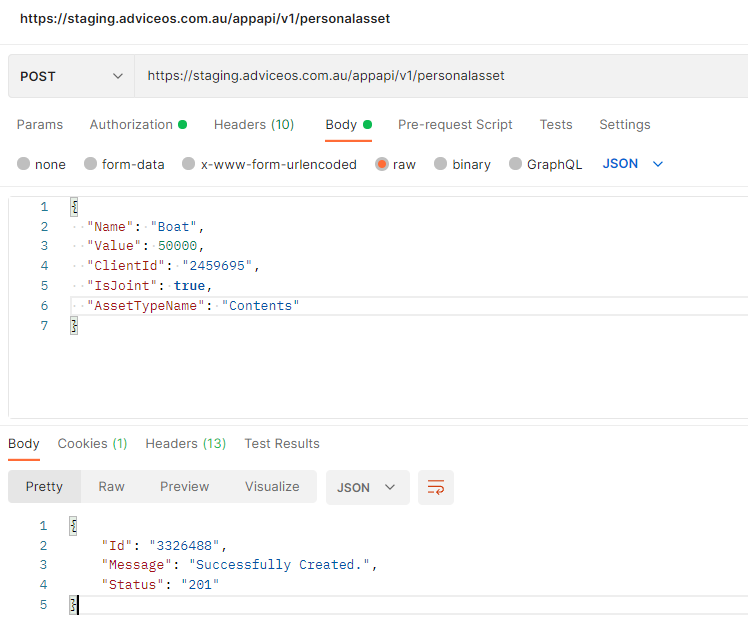
API: Creating a new Personal Asset for a Client (Post) ( /appapi/v1/personalasset )
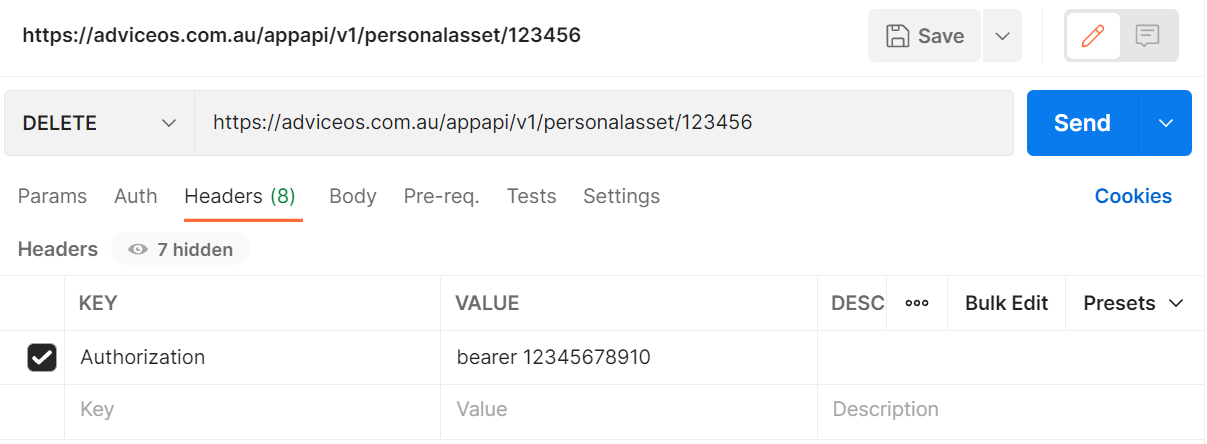
API: Deleting a Personal Asset by Id ( /appapi/v1/personalasset/{id} )
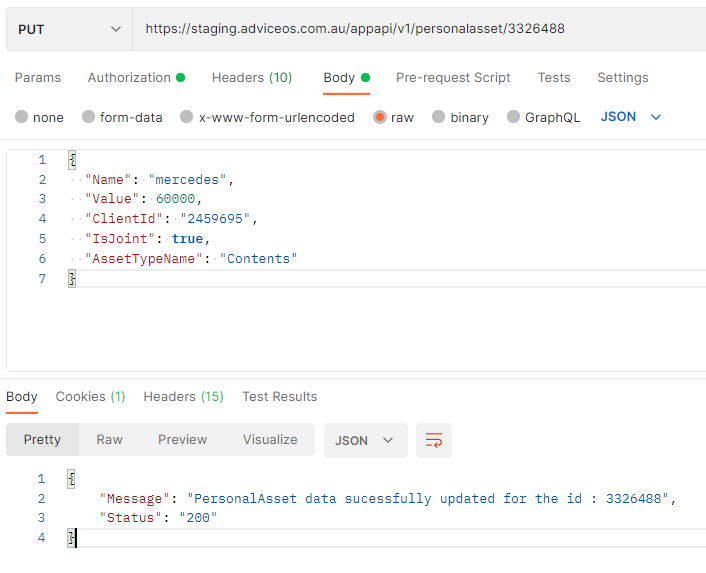
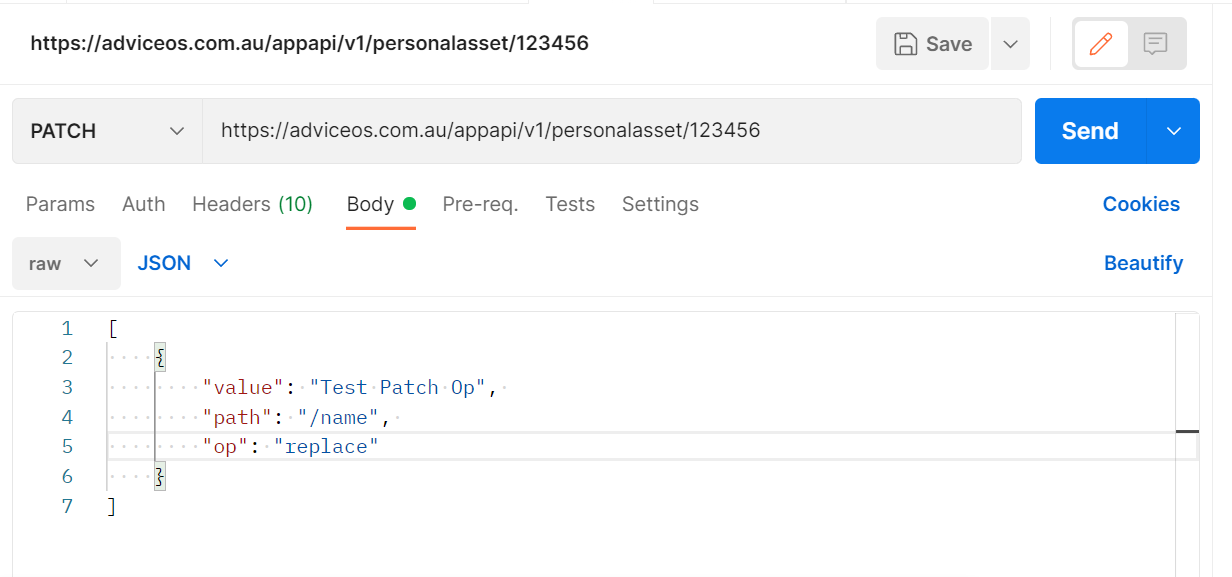
API: Updating a Personal Asset field by ID using Patch ( /appapi/v1/personalasset/{id} )
API: Updating a Personal Asset using Put ( /appapi/v1/personalasset/{id} )